


Here at ClickDimensions, we get a lot of questions from our customers about how to use the Dynamics 365 campaign entity. If you’re looking to take advantage of this handy feature and you have recently sent several related emails as part of your own campaign, this blog post is for you!
To facilitate reporting on your campaign, you can associate a variety of sent emails under one united campaign entity in Dynamics. By designating a campaign on your draft email send, any subsequent statistics are automatically related to the campaign behind the scenes through related records. This makes them quick and easy to query through the advanced find tool in Dynamics.
While saving and sharing a view with a team is one option, to make this information visible to a variety of stakeholders, highlighting these statistics directly on the campaign entity is an easy customization to make with immense benefits. Read on for instructions on adding a section to the campaign entity for associated email statistics.
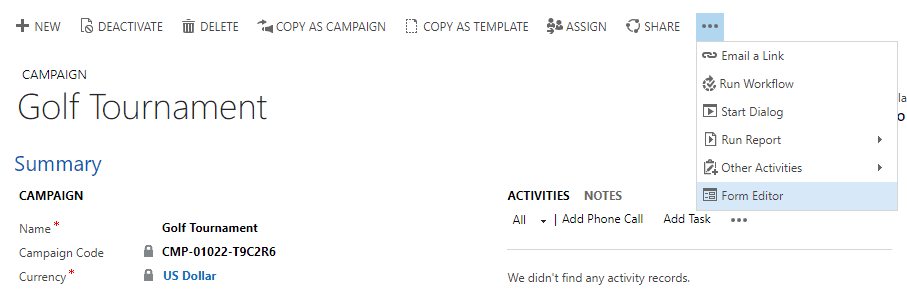
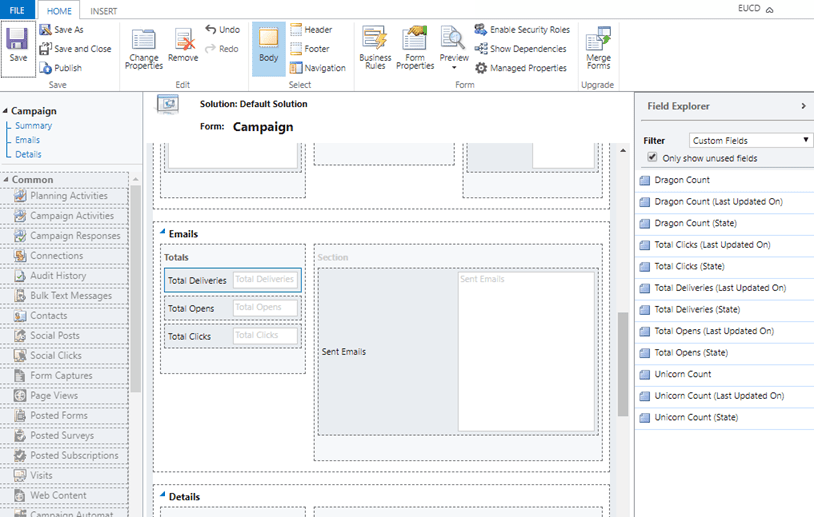
Step 1: Add a New Emails Tab
Open the form editor for the campaign entity.
Switch to the Insert menu and create a new section.
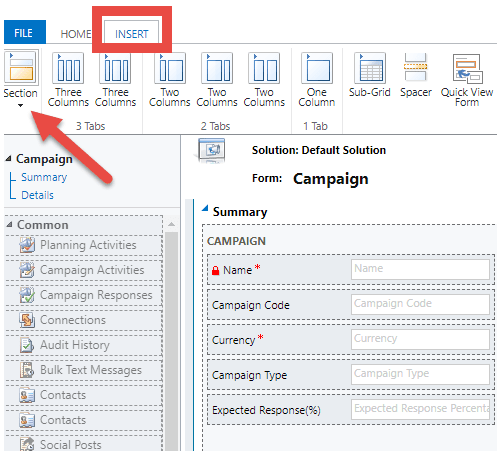
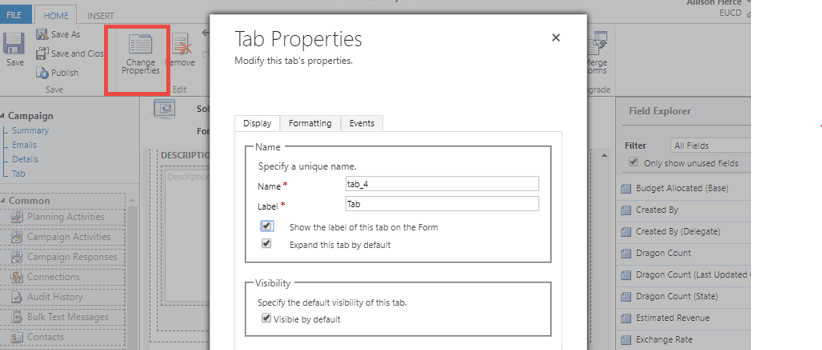
Once you have created your new section, use the Change Properties button to customize your tab. Add a two-column layout, with a 1/3 to 2/3 ratio. Give it a name. You can also set custom formatting options, if desired.

Step 2: Rollup Fields for Deliveries, Opens and Clicks
Next, you will need to add fields to the new tab that display the desired information for the related emails. For example:
Deliveries – Create a rollup field to calculate the deliveries from the sent email records. NOTE: This field does not simply count the sent email records. Some emails that were not successfully delivered will still exist in Dynamics. Those have a value of zero in the Deliveries field because the customer did not receive the message due to a bounce.
Opens – Similarly, you can create a rollup field to calculate the value of the Opens field from related sent emails.
Clicks – Lastly, you can create a rollup field to calculate the value of the Clicks field from related sent emails.
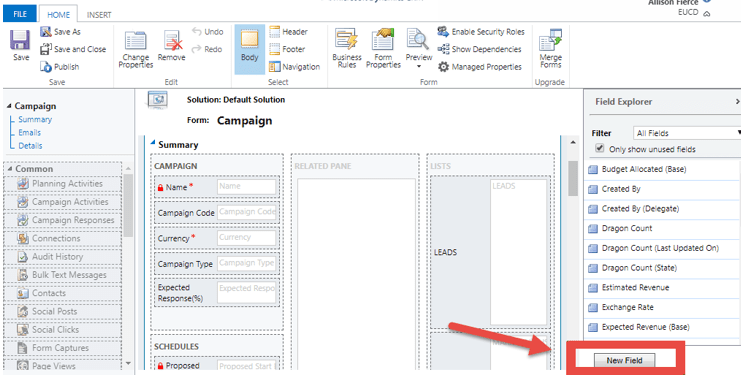
To add a new field, click the New button at the bottom of the menu on the right:
Name your field and choose the whole number value with a Rollup field type. This means the information from the related records in this field will be added together. The system will calculate this information in the background.
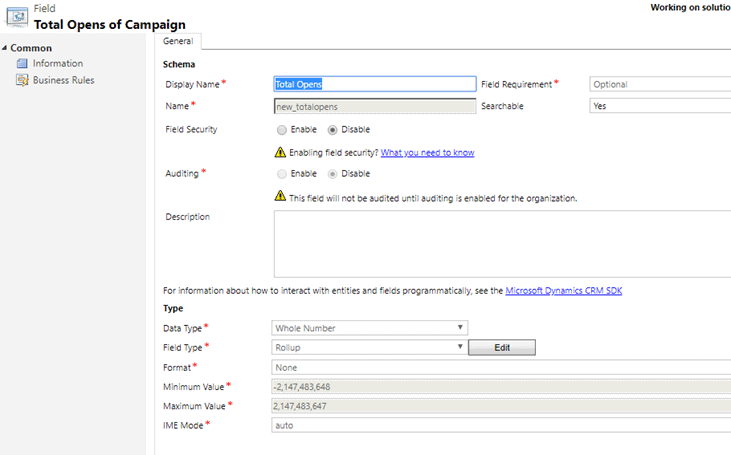
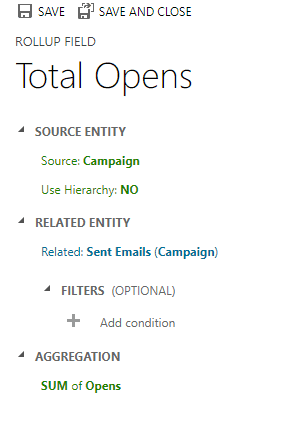
Click the Edit button next to the Rollup field type selection. This will tell the system what values it needs to count. A separate window will open where you will define this information. Using opens as an example, you would want to configure a sum of the Opens fields on the associated sent email records.
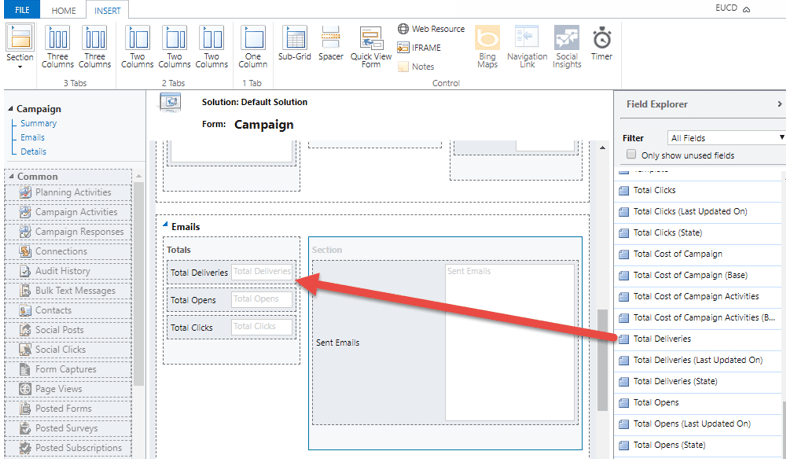
Add the field to the 1/3 column, then repeat this process for any other pertinent information. (Tip: if you don’t immediately see your new form fields in the list on the right, you may have to save, close the form editor and reopen it.)
Step 3: Include a Sub-Grid
Make the 2/3 column a sub-grid of the related sent emails.
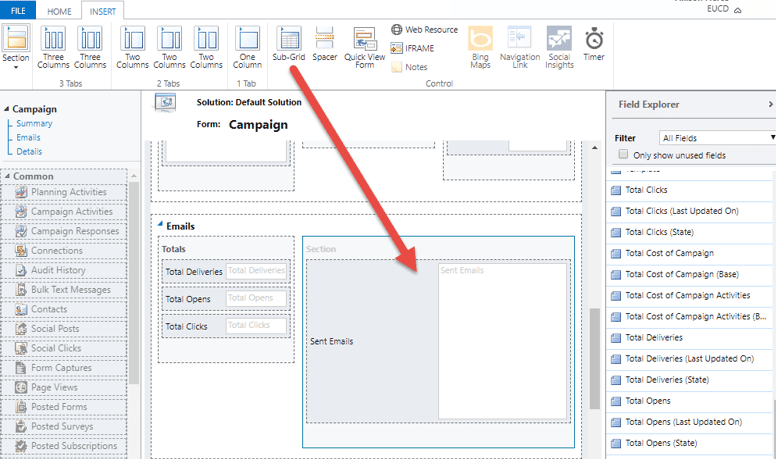
Give the section a name, indicate the entity type and select a view.

In this example, the default Active Sent Emails view is used, but sub-grids are highly customizable and allow for incorporating custom views, columns and formatting options.
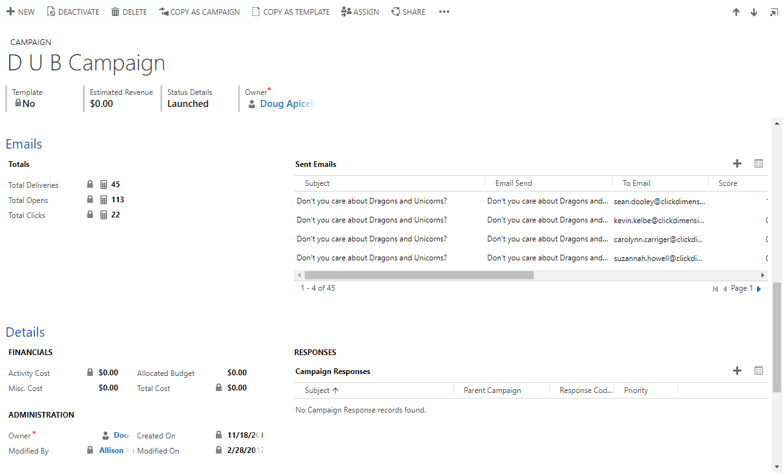
Now, the new tab in the campaign form may look something like this:
The end result:
You now have a tab that multiple teams can reference to learn more about the performance of emails sent as part of a particular campaign.
Please note: The content of this post is related to customizing native Dynamics entities. If you have questions about customizing your Dynamics environment from the out-of-the-box settings or need assistance doing so, please contact your CRM administrator or partner for assistance.
Happy Marketing!

Related Resources

How Sales and Marketing Alignment is your Key to SMB Success
Many small to medium businesses (SMBs) often grapple with one common challenge: disjointed sales and marketing communications. This misalignment can lead to missed opportunities, frustrated customers, and ultimately hindered [...]

How to Improve your Account and Buyer Insights
Understanding your target accounts and buyers is critical in today's competitive business landscape. However, many small to medium sized businesses (SMBs)face one common hurdle: the absence of comprehensive account [...]

Navigating the Sales Pipeline: Top 5 Challenges and Solutions
A well-managed sales pipeline is the lifeblood of any successful sales operation. However, it's not without its challenges. Small to medium sized businesses (SMBs) with well-defined sales processes and [...]
")
