


Attribution is an essential part of marketing today. In order to direct their dollars to the most successful initiatives, marketers must be able to track where a lead originated. You may have noticed that lead records in Microsoft Dynamics 365 feature an out-of-the-box field called Lead Source. This field can help marketers see which marketing effort generated the lead. There is also a field called Source Campaign that provides even more detail about what specifically attracted this lead. For example, you could have a Lead Source of Trade Show and then pick from a specific list of trade shows in the Source Campaign.
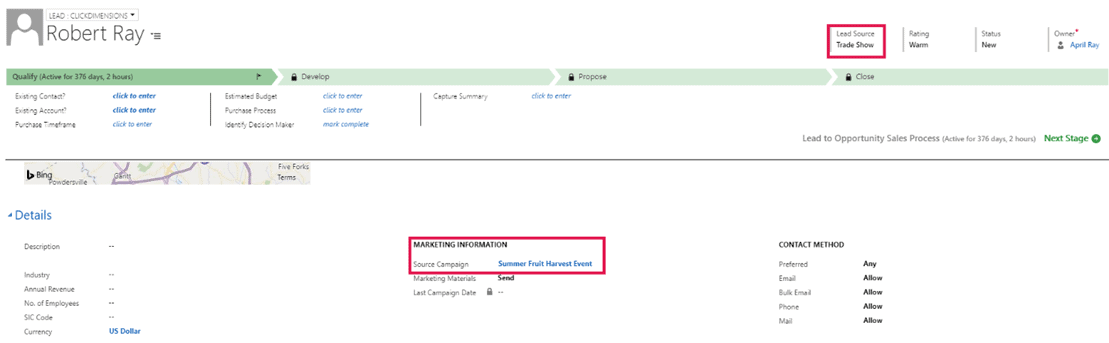
You may have also noticed that there is not a corresponding Campaign field on the contact entity. Many organizations use Dynamics’ campaign entity to aggregate different elements of various marketing efforts for a specific project. There may be a time that you want to know which campaigns a contact is associated with at ease. This could be helpful if you use the campaign field with ClickDimensions campaign automations, forms or emails, or with marketing lists in Dynamics. You can quickly add this information to the contact entity form by adding a custom sub-grid of the campaigns related to that contact. This will give you a broad overview of their engagement with you and your products.
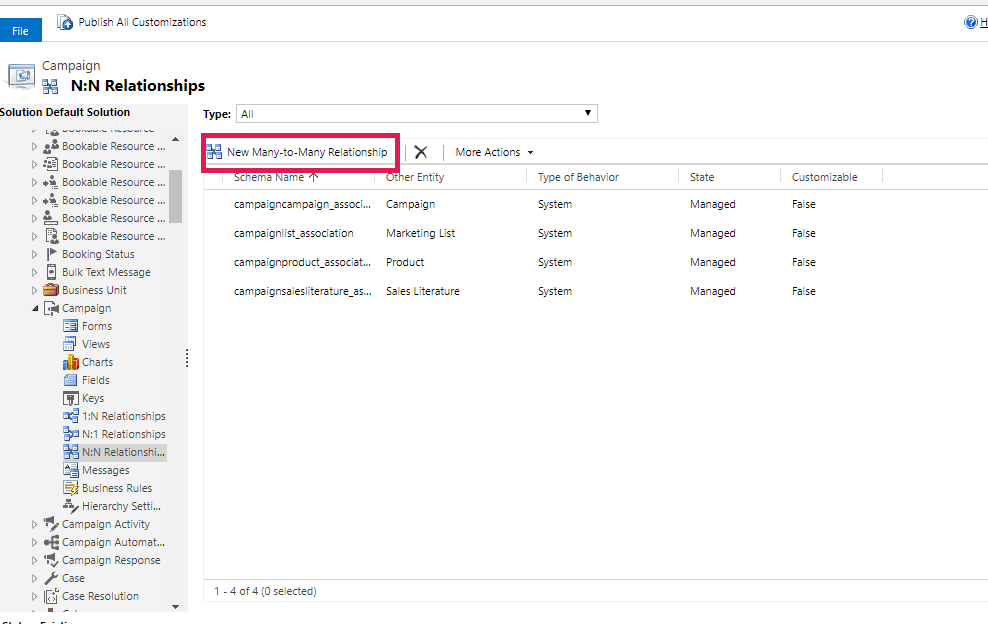
You will need to set up a few things first, so let’s get started! First, you will need to create a relationship between the campaign and contact entities. Go to Settings > Customizations > Customize the System > Entities > Campaign > and select N:N Relationship. Then, select New Many-to-Many Relationship.
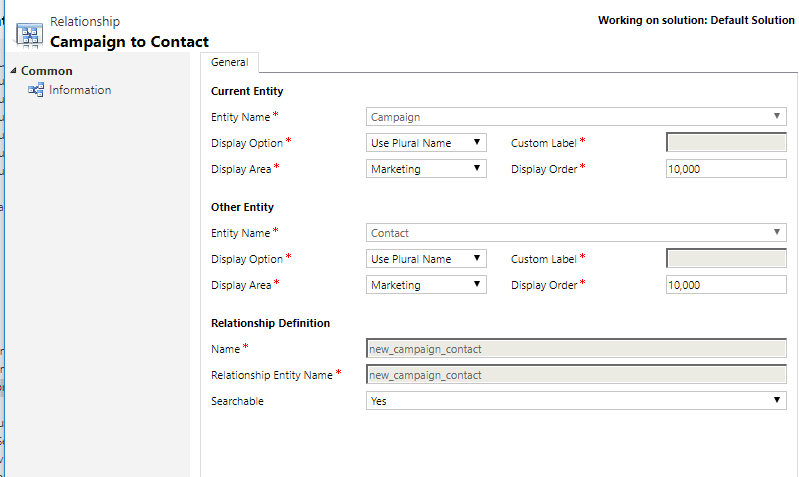
Select Use Plural Name under Display Option and designate a location on the entity form for the sub-grid to be displayed (this example uses marketing). Then, do the same thing for the other entity, except this time choose Contact as the entity name. Save, close and be sure to publish all customizations.
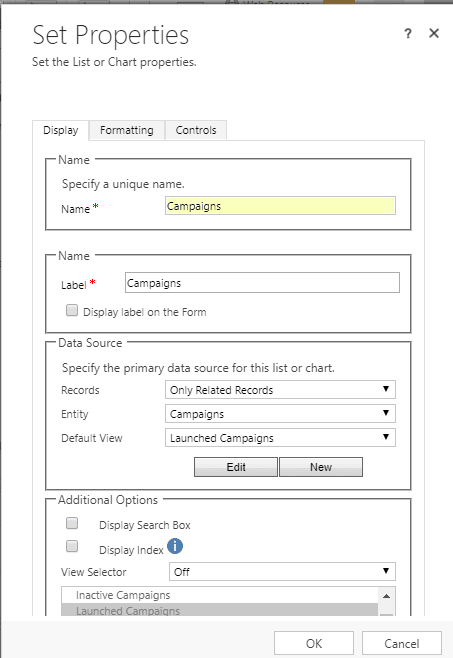
Next, set up the sub-grid on the contact entity form. Below is an example of the properties for this specific sub-grid.
The new sub-grid will now show you the information on campaigns related to the contact. Here is an example of what the contact record looks like with the campaign sub-grid.
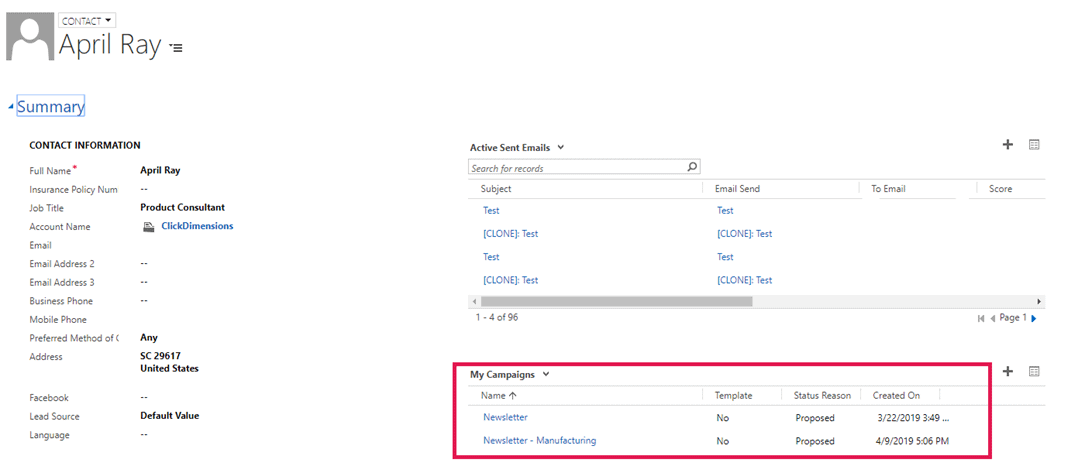
Repeat the addition of a sub-grid for the campaign entity, if desired. Here is an example of what the campaign record looks like in Dynamics:
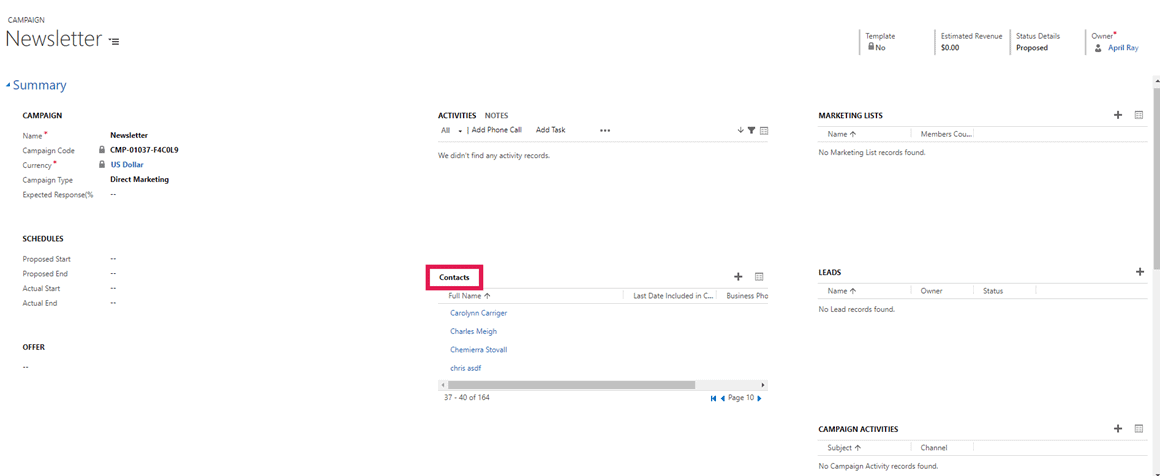
Now you can easily see the campaign information for your contacts. This will give you quick information as to what the contact may be interested in at a glance.
Happy Marketing!

Related Resources

How Sales and Marketing Alignment is your Key to SMB Success
Many small to medium businesses (SMBs) often grapple with one common challenge: disjointed sales and marketing communications. This misalignment can lead to missed opportunities, frustrated customers, and ultimately hindered [...]

How to Improve your Account and Buyer Insights
Understanding your target accounts and buyers is critical in today's competitive business landscape. However, many small to medium sized businesses (SMBs)face one common hurdle: the absence of comprehensive account [...]

Navigating the Sales Pipeline: Top 5 Challenges and Solutions
A well-managed sales pipeline is the lifeblood of any successful sales operation. However, it's not without its challenges. Small to medium sized businesses (SMBs) with well-defined sales processes and [...]
")
